Crockpot Chocolate Lava Cake

Saturday, January 21, 2012


I can't believe this came from a crockpot! I was skeptical, but glad I tried it. We were having guests over for supper and had never tried it, so I was risking a dessert disaster... but it turned out really good! I cut the recipe in half and still had plenty for 4.5 adults and 2 kids. It's really fun to watch the cake puff up in the crockpot, and then to slice into it and have the oozy 'lava' come gushing out of the center. Each person gets a nice slice, and then you scoop the gooey, yummy lava over the top. The flavor is very tasty-- not the 'chocolatey-ist' chocolate cake I've ever eaten, but still very delicious. The novelty and fun of the recipe is what makes this one a keeper. We will be making it again!

Crockpot Chocolate Lava Cake
FOR THE CAKE:
  • 2 cups Brown Sugar
  • 2 cups All-purpose Flour
  • 6 Tablespoons Unsweetened Cocoa Powder
  • 4 teaspoons Baking Powder
  • 1 teaspoon Salt
  • 1 cup Milk
  • 4 Tablespoons Butter, melted
  • 1 teaspoon Vanilla Extract
FOR THE FUDGE TOPPING:
  • 1 1/2 cups Brown Sugar
  • 1/2 cup Unsweetened Cocoa Powder
  • 3 cups Boiling Water
Directions: For the cake: Mix together the sugar, flour, cocoa, baking powder and salt in a large bowl. Stir in milk, melted butter and vanilla until combined. Spread the batter over the bottom of a large crockpot.
For the fudge topping: Mix together the brown sugar and cocoa. Sprinkle mixture over the cake batter.
Pour the boiling water over the top. DO NOT STIR! Cover and cook on High for 2 - 2 1/2 hours.
Cake will be very hot! Turn off heat, and remove lid. Let sit 20-30 minutes before serving, so its still warm but wont burn your mouth : ) ENJOY!!

source: www.life-as-a-lofthouse.blogspot.com

Grab and Go Breakfast Bars

Thursday, January 19, 2012


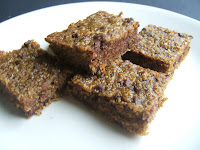
My breakfast staple for the past couple of months has been my Breakfast Muffins. I have a way of finding something I like and then not straying from it for a long, long time (my breakfast smoothie phase lasted over a year!). But, I was ready for something different, and these sounded good. They really are delicious! They are filling, too. The boys didn't rave over them, but ate a couple and said they were good, so that passes the test for me! I froze the individual bars that were left after we snacked on them and have been pulling one out each morning to cook in the microwave for about 25 seconds. Perfect breakfast!


Grab And Go Breakfast Bars
Amy (amylz)
This recipe makes about 16 bars.

1 cup oats - old-fashoned or quick-cooking
1 cup shredded wheat cereal
1 cup walnuts
1 1/2 cups dried fruit or raisins (apricots and cranberries work great)
1/2 teaspoon ground cinnamon
1/2 teaspoon salt
2 large eggs
1/3 cup honey
1 teaspoon vanilla extract
1/2 cup mini chocolate chips

Preheat the oven to 350 degrees. Prepare an 8 x 8-inch baking pan by spraying the inside lightly with nonstick cooking spray. Place the oats, shredded wheat, walnuts, dried fruit, cinnamon, and salt in a food processor and pulse until the mixture is finely chopped. In a large bowl, whisk together the eggs, honey, and vanilla. Add the oatmeal mixture and chocolate chips and stir to combine. Transfer to the baking pan and flatten down gently with the back of a spoon or spatula to spread evenly. Bake about 18 minutes until the edges turn golden brown. Let the dish cool completely before slicing into single-serving bars. These bars freeze well. Wrap leftover portions in plastic wrap or aluminum foil and store in freezer for up to 2 weeks. Each bar has about 170 calories and 7 grams of fat (1.5 grams saturated fat).

Magic Mushroom Pizza

Wednesday, January 18, 2012


I don't normally follow a 'recipe' for pizza. I mean really-- pizza is supposed to be a creative process, with no rules! However, I've run into quite a few recipes that have intrigued me. I pulled this one out of a Shape Magazine a few months ago, and thought it sounded wonderful. It IS wonderful!!!

The amount of mushrooms and arugula are really enough for two pizzas. The second time I made the pizza, I only grabbed a handful of arugula and sprayed a little olive oil on it, stirred it around for a few seconds. I found that dressing a whole three cups of arugula is not necessary, and if you have leftovers, the arugula won't keep very well.

Magic Mushroom Pizza
SHAPE magazine

Ingredients

  • 3 cups mushrooms, thinly sliced
  • 1 tablespoon chopped fresh parsley
  • 1 garlic clove, minced
  • 1/2 small red chili pepper, thinly sliced, or a pinch of dried red pepper flakes
  • 1 teaspoon chopped fresh rosemary
  • salt and freshly ground pepper
  • 1 eleven inch pizza crust (Perfect Pizza Dough recipe) Like I mentioned above, there are enough mushrooms and arugula for two pizzas.
  • 1 cup shredded low-fat mozzarella
  • 1/2 cup crumbled reduced-fat feta
  • 3 cups arugula
  • 1 tablespoon extra-virgin olive oil
  • 1 teaspoon white wine vinegar

Directions

  1. Preheat oven to 450 degrees.
  2. In a medium bowl, combine the mushrooms with parsley, minced garlic, red chili pepper, rosemary, and season with salt and pepper, set aside and let sit for 5 minutes.
  3. Sprinkle prepared pizza dough with mozzarella, feta, and mushroom mixture. Bake for 7 to 10 minutes or until edges of crust are golden brown.
  4. Meanwhile, toss arugula with oil and vinegar and season with salt.
  5. Remove pizza from oven, cut into slices, and place on a serving tray. Top each slice with dressed arugula.

Tip: Don’t try to cut the calories further by using fat-free feta – it won’t melt properly.

Olive Focaccia

Saturday, January 14, 2012


I'm not sure where focaccia has been all my life...but now that I've found it, I'm hooked! What a delicious and versatile bread. It's good plain, with soup, or sliced and made into the world's best grilled sandwich ever (or if you are fancy and have a panini maker, a panini--but I'm still in plain-old-grilling-on-a-skillet-phase). It's a fun bread to make, too, especially when you get the part when you dimple it (with your fingers or the end of a wooden spoon), and put olives and herbs into it. I love this recipe, and would love to try putting little hunks of garlic into the dimples before baking it...and experiment with different herbs. Perhaps fresh tomatoes and cheese to make a thick pizza-bread. So many options!

Here is a loaf, looking all dimply before letting it rise.


Olive Focaccia

Ingredients

2 T. yeast
4 c. flour (I love mixing up flours...I have been using 2 c. white whole wheat, 1 c. stone ground whole wheat, and 1 c. unbleached all purpose)
2 c. warm water
1/4 c. pitted olives (or more...)
2 T. olive oil
1 T. fresh rosemary
kosher salt
1 T. each flour and sugar for proofing yeast

1. Proof the yeast by mixing it with the water, and 1 T. each sugar and flour. Let it sit for 10 or 15 minutes; if it's nice and frothy, the yeast is good.

2. Once the yeast is proofed and foaming, add the olive oil and enough flour to make a slightly sticky wad of dough (I use slightly heaping cup measures and the dough is still VERY sticky). You want it to be workable enough to knead for 10 to 15 minutes. I have to add a few small handfuls of flour, and oil my hands, while kneading to keep from sticking too much. This can be done with the dough hook of a big stand up mixer (one of my dream cooking toys that maybe I'll have one day...but for now, my hands get lots of kneading exercise!).

3. Put dough into oiled bowl, cover with towel, and let rise for up to 2 hours, until doubled. This usually only takes 1 hour for me. After the dough is nice and puffed up, turn it out onto a piece of parchment paper, knead lightly while shaping into a rectangle, or oval (or any shape), about an inch thick. Transfer the loaf to a baking sheet by picking it up with the edges of the parchment paper.

4. Now for the fun! Take the end of a plastic or wooden cooking spoon (or use fingertips) to dimple the bread all over. Slice olives in half and press into dough, then sprinkle fresh rosemary (or thyme, or sage, or any herb you want) into the dimples. Brush olive oil all over it, then sprinkle with salt (I like to use kosher because the flakes are nice and big).

5. Allow your focaccia loaf to rise until doubled, then bake at 350 degrees for 25-30 minutes, or until golden brown.

Tip: The olives in the bread start looking 'gunky' and kind of gross after just a couple days. They are still fine to eat, but just don't look as good as when the loaf is super fresh. If you don't think you are going to eat it all in one day, cut into sandwich size pieces and freeze. Each hunk will thaw perfectly in the microwave at a minute or so of cooking.

Here is a pic of a hunk of the focaccia--sliced in half, olive oil sprayed on the flat, sliced sides and then grilled with chicken and cheese inside. Then fresh lettuce placed inside after grilled. YUM! There are so many ways you could fill/grill a sandwich like it.
Source: The Quarter Acre Farm by Spring Warren

Grilled Potatoes with Parmesan and Herbs

Friday, January 13, 2012


I started making this recipe before I realized it is intended for the grill (yes, I realize the word 'grilled' is in the title...I think the word 'Parmesan' blinded me temporarily). I couldn't convince the hubby to scrape snow off the grill cover to finish supper, so I improvised and turned on my oven's broiler instead. The potatoes turned out sooo good! Will definitely make them again using the broiler, and probably try them out on the grill, as well, once the birds start singing out there!

Grilled Potatoes with Parmesan and Herbs

Ingredients

3 lbs small red skinned potatoes (or whatever smallish potatoes you have on hand)
4 T. olive oil
1 c. thinly sliced green onions
3 T. chopped Italian parsley
3 T. grated Parmesan
3 garlic cloves, finely chopped
2 t. fresh oregano (I used 1 t. dried)

Cook potatoes in large pot of boiling salted water until tender, about 15 minutes. Drain potatoes and cool.

Prepare grill (med. heat). Cut potatoes in half, transfer to a large bowl. Add 2 T. olive oil and toss to coat. Grill potatoes until golden, turning occasionally, about 5 minutes (this took about twice as long when I put them under my oven's broiler). Transfer to bowl. Drizzle 2 T. olive oil over and add remaining ingredients. Toss to coat. Season with salt and pepper and serve warm.


Corn Soup


If you google Corn Soup recipes, there are so many wonderful ways to make it, and I have my eye on a few variations that I hope to make soon. This recipe, however, is very minimalist, and sometimes the simplest recipes are the ones I turn to when time and ingredients are short. The kids love it, it goes well with Mexican meals or with sandwiches, and it can be left alone or dressed up with fresh cilantro. In the picture, along with the cilantro, you can see bits of red pepper and corn peeking out. Reserving some of that before you blend up the rest of the soup is a wonderful way to make the soup look more interesting and give it a little texture in each bite. Depending on the size of the red peppers you use, the soup's color will vary from creamy yellow to sunset-orange. I've also found that the longer you blend the soup, the more vibrant the color. We love ours nice and pureed and orange, but if you want a chunkier, more yellow soup, don't blend the heck out of it like I do!

Corn Soup

Ingredients
2 roasted red peppers (I use jarred)
2 T. vegetable oil
1 medium onion, finely chopped
3-4 c. corn niblets, thawed if frozen
3 c. chicken stock
2/3 c. light cream (can use milk, or sour cream--sour cream will give a sour bite--or omit this ingredient entirely and it will still taste great)
salt and pepper to taste

If you are using fresh red peppers, roast, peel, and set them aside. Otherwise open your jar of roasted red peppers like I do. :)

1. Heat the oil in a large saucepan. Add the onion and saute over low heat for about 10 minutes, until it is translucent and soft. Dice the roasted red peppers and add them to the onion. Add the corn and cook over medium heat for 10 more minutes. Spoon out a half a cup or so of the mixture and set it aside.

2. Pour the chicken stock into the pan and let the soup simmer for about 15 minutes, then turn off the heat and let it cool slightly. Blend the soup in a blender or food processor until it's as smooth as you want it. Pour it back into the pan and heat, then serve. Sprinkle with roughly chopped cilantro and some of the reserved corn/pepper/onion mixture, if you want.

Pasta con Zucca

Thursday, January 12, 2012


This recipe is so rich, hearty, and buttery. I had a delicata squash begging to be used up, and this is where it went! I made it for lunch one day, only I halved the recipe and my hubby and I split it. I was full and content for the rest of the day...thank goodness, because it is definitely not a low-calorie meal! I love the technique of crisping the fresh sage leaves in butter and adding it to the dish...WOW! I used whole wheat linguine, and I think that added a lot to the earthy, rich taste.

I haven't tried this out on the kids yet, but I sure will, the next time I have a squash. I think they may just like its buttery, sweet flavors.


Pasta con Zucca


Ingredients:

4-6 cups cubed orange fleshed winter squash

(I used delicata, you could use pumpkin, Hubbard, even sweet potatoes)

1-2 cups sage leaves

8 oz linguine

1 cup shredded parmesan cheese

5 T. butter, divided

2 T. brown sugar

olive oil

1. Place the 1/2 in. cubes of squash into a bowl, drizzle with olive oil and brown sugar. Stir until juices from squash mix with the oil/sugar to form a glaze.

2. Roast the squash on rimmed cookie sheet at 450 until caramelized and tender (took about 25 minutes for me).

3. As the squash roasts, melt 1 T. butter in a saucepan, adding in the destemmed sage leaves. On medium/low heat, with the butter barely bubbling, fry the sage leaves until crisp (about 15 minutes).

4. Boil linguine according to package directions. Drain, and put remaining butter in the cooking pan to melt (this is where you can adjust for taste...I tried to scale back on the butter for calorie reasons). Return drained linguine to pan and toss with the butter, crisp sage leaves, and parmesan cheese.

5. Dish the pasta out into individual servings and put the squash on top. Makes 6-8 servings (or less if you are really hungryWink).


Source: adapted from The Quarter Acre Farm by Spring Warren

Crockpot Overnight Oatmeal with Maple & Brown Sugar

Saturday, January 7, 2012


I love steel cut oats. This is a nice recipe because I can divide it into portions to store in the refrigerator, and warm a bowl up in the morning for breakfast. It has the perfect amount of flavor and sweetness for me (the boys always want to add more brown sugar, of course). Real maple syrup is a must. It's really important not to overcook the oatmeal. Since it only takes 6-7 hours to cook, it's not always feasible to make it overnight (unless you are a night owl like me and don't go to bed until midnight--yet still have to get up at 6 to start the day ). Sometimes I'll let it cook on a Saturday when I can keep an eye on it and not worry about it overcooking, then divide it into portions. If I do feel like a little more sweetness, I'll throw a few raisins on top before heating it in the microwave.

The recipe makes about 8 cups of prepared oatmeal. I use 3/4 c. as a serving, at around 200 calories. Cut the recipe in half if you don't think you'll eat that many servings!


Crockpot Overnight Oatmeal with Maple and Brown Sugar

(luckymommyto2boys ~ Amy)

8 cups water
2 cups steel-cut oatmeal (ONLY USE STEEL-CUT)
2 tablespoons butter
1/2 cup brown sugar
1/2 cup maple syrup

Add all ingredients to 5- or 6-quart slow cooker. Cook on low for 6-7 hours. Drizzle each serving with maple syrup if desired.

Olive Oil Pizza Dough

Thursday, January 5, 2012


We are a homemade-pizza kind of family, and usually have it once a week. We all like different decorations: The hubby likes meat, spice, and more meat, the younger two like plain cheese or pepperoni, the oldest son and I love ours with NO tomato sauce, lots of fresh tomatoes, onions, peppers, and feta cheese. Making sure all the pizzas get baked within a reasonable time is the hardest part (oh how I'd love to have a convection oven!) Although a bit more hands-on and time consuming, homemade pizza night is sooo worth it. Start out with good, easy dough, let everyone decorate their own, and pizza night satisfies everyone!

I still love the recipe I have for Perfect Pizza Dough, but this one comes in at a close 2nd place. I found it on www.mybakingaddiction.com. The flavor is so amazing! It doesn't make the super-thin crust that we love, but the chewy texture tastes soooo good, and there's just enough crisp on the outside of the finished pizza.  My husband says this is his favorite out of all the pizza doughs we have tried so far. One batch of it made enough for 4 cookie-sheet size pizzas--a little too much for our family for one meal (although, we ADORE leftover pizza, so too much is NOT a bad thing). I still have a ball of it in the fridge that I'll try making bread sticks with tonight for supper...and the next time I make it, I may cut the recipe in half.

I did make a couple tiny changes: I cut the salt in half, and I used 3 1/2 cups white whole wheat flour, 3 cups unbleached all-purpose flour. OH! And I started making supper before I realized the recipe said to let the dough rise for 2 hours. I didn't! I let it rise for maybe 20 minutes while I prepped all the toppings. Next time I'll try letting it rise, but it tasted perfect without!


Olive Oil Dough


YIELD: Makes 4-1 lb loaves

INGREDIENTS:

2-3/4 cups lukewarm water
1-1/2 tablespoon granulated yeast (2 packets)
1-1/2 tablespoons Kosher salt
1 tablespoon sugar
1/4 cup extra virgin olive oil
6-1/2 cups unbleached all-purpose flour

DIRECTIONS:

1. In the bowl of your stand mixer fitted with the dough hook attachment, or in a large (5 quart) bowl working with a wooden spoon, mix the yeast, salt, sugar, and olive oil with the water.
2. Mix in the flour without kneading. I found this process to be incredibly simple with my stand mixer, but it will certainly come together the old fashioned way. If you are not using a machine, you may need to wet your hands in order to incorporate the bit of flour.
3. Transfer dough to large (5 quart) bowl or lidded food container. Cover (not airtight), and allow to rest at room temperature until dough rises and collapses (or flattens on top), approximately 2 hours.
4. The dough can be used immediately after the initial rise, though it is easier to handle when cold. Refrigerate in a lidded (not airtight) container and use over the next 12 days.
5. To use, spread/roll out as you like, prebake at 500 degrees for 5-7 minutes, put desired toppings on and then bake for another 5-7 minutes or until crust is browning on the edges.

NOTES:

- from Artisan Bread in Five Minutes a Day
- This recipe can easily be doubled or halved

Honey Sauced Chicken

Monday, January 2, 2012


I have a huge weakness for 'Chinese' food (in quotations because I'm fully aware that the flavor I crave is not really Chinese, but America's unique interpretation of it). My oldest son and I share this love...the other men in the house aren't as thrilled but don't complain when I decide to either get Chinese takeout or cook some myself. We do have a Chinese restaurant within walking distance of our house...and the number is programmed into my phone...but making my own 'takeout' is much cheaper!

This dish uses a LOT of honey, so I won't make it a lot...however, it was really tasty and I know I will definitely make it in the future. I put some precooked rice noodles in the crockpot about a half hour before we were going to eat. Delicious!

Honey Sauced Chicken
Kkmas0n ~ mmmmCafe

1.5 pound chicken (of your choice)
1 tsp. salt
1/2 tsp. black pepper
1 cup honey
1/2 cup soy sauce
1/4 cup chopped onion (or 1/16 cup onion flakes)
1/4 cup ketchup
2 Tbs. vegetable oil
2 clove garlic, minced
1/2 tsp. red pepper flakes

Season both sides of chicken with salt and pepper, put into crock pot. In a small bowl, combine honey, soy sauce, onion, ketchup, oil, garlic and pepper flakes. Pour over chicken. Cook on low for 3 hours or on high 1 1/2 hours. Chicken into bite size pieces, then return to pot and toss with sauce. Serve over rice or noodles.

To bake chicken as a 30 minute meal: Dice chicken and season both sides with salt and pepper, place in 8x8 pan. Pour sauce over chicken and bake at 350 for 20 minutes, stirring after 10 minutes.

Baked Fajitas

Sunday, January 1, 2012


This is a very easy, quick way to make fajitas. I love making sure the dish is chock-full of veggies and coating them all in the sauce with my hands before baking. Everyone here loves this! My picky child just picks out whatever veggie he thinks he hates that day (and sometimes accidentally eats one of those--seemingly without noticing!). I found this recipe on babycenter and my small changes are in parentheses.

Baked Chicken Fajitas

EliseaGracesMommy via Eatinonthecheap.com


Ingredients

1 lb boneless, skinless, chicken breast, cut into strips (I use shredded rotisserie chicken)

1 (15 ounce) can diced tomatoes (I use fresh cut up tomatoes)

1 (4 ounce) can diced green chilies

1 medium onion, sliced (oh gosh, more than that!!!)

1 large bell pepper, seeded and sliced

2 tbsp vegetable oil

2 tsp chili powder

2 tsp cumin

1/2 tsp. garlic powder

1/2 tsp dried oregano

1/4 tsp tsp salt

12 flour tortillas, warmed to serve

Directions

Preheat the oven to 400. Grease a 9x13 inch baking dish. Mix together chicken, tomatoes, chilies. peppers, and onions in the dish.

In a small bowl combine oil and spices. Drizzle the spice mixture over the chicken and toss to coat.

Bake uncovered for 20-25 minutes or until chicken is cooked through and the vegetables are tender. Serve with warm tortillas and enjoy.


Little*Garden*Kitchen Copyright © 2009 Designed by Ipietoon Blogger Template for Bie Blogger Template Vector by DaPino