St. Patty's Day Pancakes

Wednesday, February 26, 2014


I've always loved making green food for the kids on St. Patrick's day. Colorful food is fun! Artificial colors...eh, we should probably pass. Here's a great way to get some green in your pancakes for the good ol' shamrock holiday, or for any day that you decide green is your favorite color!


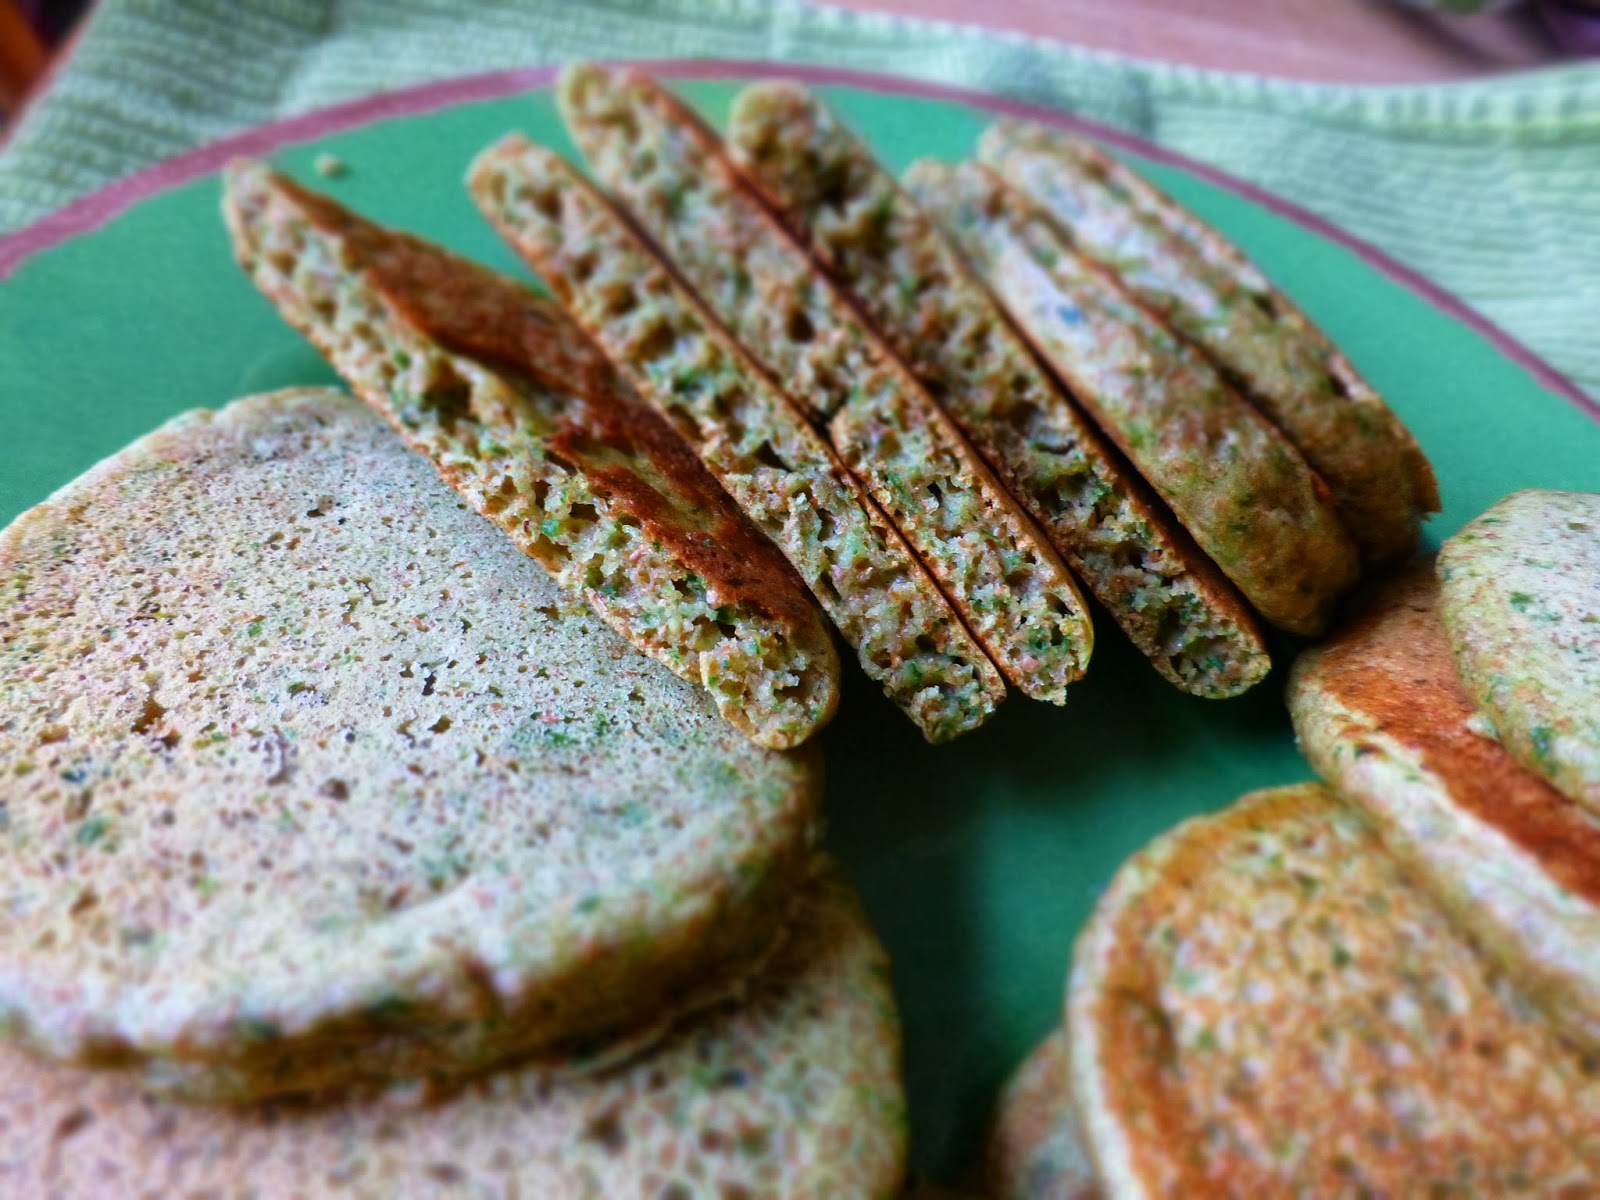
I used spinach that I had frozen, but I think using fresh would work better. Instead of all green, we got specks of green. Next time I will try fresh.


I was certain the kids would be suspicious. They were. But, I was careful not to say the "S" word when they asked what the green stuff was. I told them simply, "There is a special ingredient in these!" and that was enough. They all had three helpings.

Recipe was found HERE

St. Patty’s Day Pancakes

serves 5-6

2 cups whole wheat pastry flour, white whole wheat flour or whole spelt flour* (I tested the recipe with sprouted spelt flour.)
1 teaspoon aluminum-free baking powder
1 teaspoon aluminum-free baki ng soda
1 teaspoon fine sea salt
2 cups buttermilk**
2 large eggs
1 teaspoon pure vanilla extract
1 Tablespoon 100% pure maple syrup
2 cups packed baby spinach leaves
3 Tablespoons unsalted butter, melted
Melted, unrefined coconut oil for brushing the griddle (or butter)

  1. Preheat a griddle to 400 degrees or medium heat. (I’ve noticed that many griddles cook differently even at the same temperature!)
  2. Combine the flour, baking powder, baking soda and salt in a large mixing bowl.
  3. In a blender combine the buttermilk, eggs, vanilla, maple syrup, spinach and melted butter until completely smooth.
  4. Pour the wet mixture into the dry ingredients and stir until just combined.
  5. Brush the griddle with coconut oil and spoon about ¼ cup of batter onto the griddle.  When bubbles start to form on the surface of the pancake and the edges become slightly dry, flip it over and cook until down.  Maintain the heat on medium-low or 400 degrees.

*Gluten-free:  substitute 1 cup buckwheat flour and 1 cup brown rice flour for the wheat flour.  Or you can use GF oat flour, too, such as 2/3 cup oat flour, 2/3 cup buckwheat flour and 2/3 cup brown rice flour.
**No buttermilk?  Sub half unsweetened yogurt and half whole milk.


Fluffy Whole Grain Pancakes

Saturday, February 15, 2014


I am so glad I found this method! I will warn you, it will dirty up several bowls. ABSOLUTELY worth it, though! My hubby just bought me a new set of pyrex bowls for my birthday because I'd been making due with two beat up plastic bowls (the third became the victim of being set on a hot stove burner, thus being ruined). I found this recipe just days after my much-appreciated gift of bowls...it was fate. (I'm not the only one who adores getting things like bowls and blenders from their hubbies, right?)


Regardless of the multiple dirty bowls...you MUST try this. Whole wheat pancakes are not known to be fluffy and delicious. But by folding in beaten egg whites, the texture and flavor become astounding. I was skeptical about using coriander, but I added it anyway, and I think it added something really nice to the final flavor. The kids and I devoured these for lunch; my nephew Justin didn't even use syrup. I am thinking of trying the method on my other pancake recipes, too.


I'm starting to post a lot of recipes by Mark Bittman lately, and for good reason. His recipes are solid, simple, and so good. I'm glad I finally checked out a couple of his cookbooks.

*note: this method is also found in The Tassjara Bread Book. Incidentally, in the copy I read, Mark Bittman was one of the positive reviewers and stated that this book launched him into bread making. :)


Fluffy Whole Grain Pancakes by Mark Bittman (found recipe here
1 2/3 cups whole-wheat flour
2 tablespoons sugar
1 tablespoon baking powder
1/2 teaspoon ground coriander or cardamom
1/2 teaspoon ground cinnamon
1/2 teaspoon salt
2 large eggs, separated
2 cups milk.
1. Melt 3 tablespoons butter. In a large bowl combine flours, sugar, baking powder, spices and salt.
2. Beat egg whites with an electric mixer or a whisk until stiff peaks form, but do not overbeat. In separate bowl beat milk, yolks and melted butter until foamy, a couple of minutes. Add milk mixture to flour mixture and give a couple of good stirs, but do not overmix. Fold in egg whites and stir until batter is just evenly colored and relatively smooth; it's O.K. if there are some lumps.
3. Heat a large skillet (preferably cast iron) or griddle over medium heat until a few drops of water dance on its surface. Add butter as needed (or use a thin film of neutral oil, like grapeseed or corn). When skillet is hot, spoon batter into pan. Cook until bubbles form and pop, about 2 minutes; you may have to rotate cakes to cook them evenly, depending on your heat source and pan. Then carefully flip pancakes. Cook until well colored on other side, another minute or two more. Serve or keep in warm oven for a few minutes.
Yield: At least 6 servings.
Stir-ins: 1/2 cup cornmeal, rolled oats or oat or wheat bran in place of 1/2 cup of either flour; or add 2 tablespoons ground flaxseed; or add up to 1/2 cup cooked grain like quinoa, brown rice or millet. (The flour in this recipe can be all whole-wheat or all buckwheat.)
Lighter cakes: Use 2/3 cup white flour in place of 2/3 cup of the whole-wheat flour. This makes separating the eggs optional.
Savory cakes: Omit sugar and increase salt to 1 teaspoon; replace cinnamon with cumin. Serve like bread with soups or stews.

Noodles with Mushrooms

Tuesday, January 21, 2014


Sometimes I just really want a big old bowl of noodles. Ramen used to fill the bill. But lately I've been trying to avoid MSG and processed stuff as much as a can. I thought I'd try a big batch of this recipe and freeze portions for when the mood hit for a bowl of noodles, or to take out and let thaw until lunchtime. The noodles actually hold up well in the freezer!

I adapted the recipe from Mark Bittman. His recipe called for a whole pound of pasta, but I found that even using 12 oz the first time was too much pasta for mushroom. Since the brand of soba noodles i use comes in 9.5 oz packages, I decided from now on that is how I will make it. I can get four or five servings out of this. I divide it right after it's cooled into serving size containers. I saved the water from soaking the dried mushrooms and put a little in each lunch container, so that it would have some extra moisture for reheating. Fresh cilantro is soooo good on top!

Noodles with Mushrooms
Ingredients

1/4 to 1/2 c. dried porcini or shiitake mushrooms
1 c. hot water
salt
1 pound fresh mushrooms (shiitakes are nice, but any will do; remove the stems)
3 T. peanut oil, 1 T. toasted sesame oil
freshly ground black pepper
9-10 oz soba noodles

1. Soak the dried mushrooms in the hot water for 20 minutes.

2. Boil the noodles according the package directions, drain, reserving some of the liquid. Rinse with cold water and set aside.

3. While soaking and boiling, chop mushrooms to desired size. Warm the oils in a large skillet or wok over medium heat, then add all the mushrooms (scoop the dried mushrooms out of their soaking water with a slotted spoon, reserving liquid). Sprinkle with salt and pepper and raise heat to medium high. Cook, stirring occasionally, at least 10 minutes.

4. Add 1/2 c. of pasta cooking water OR mushroom soaking water to the mushrooms, then dump in the cooked noodles. Toss everything together well, adding a little more sesame oil if desired. Add more liquid if the noodles seem too dry.

5. Season with soy sauce (I use a spray bottle of Bragg's liquid aminos) and cilantro, and enjoy! I get 5 generous lunch servings out of this!

Wheat-Free Chocolate Chip Cookies


This recipe has been removed for further tinkering! It turned out perfectly the first few times I made it, but I've had trouble recreating it. I'm working to figure out what went wrong, because the cookie was wonderful orginally. But I don't want to share a recipe that is finicky! Check out my other cookies and sweets recipes, I promise they are tried and true!

Easy Whole Grain Flatbread

Sunday, January 19, 2014


What I like about Mark Bittman's recipes is that they are flexible, simple, and can be changed up easily.

This one seemed way too simple to taste good. But I had to try it. It is absolutely amazing! Even as I poured the pancake-y batter into the pan of oil and onions, I was thinking "there is NO Way this is going to turn out." Halfway through baking I looked in and thought "wow, that looks oily." Once it was finished baking, however, the crisped edges were very promising--and once I took a bite, I was immediately sold. WOW!

What a tasty and simple bread, perfect with soup, salad, pasta, or whatever else you are eating. The onion and the rosemary (I used a sprig that I'd taken from the garden and dried) gave the bread incredible flavor. I can't wait to try cornmeal, and if I can find it, chickpea flour, along with other herbs.

*note: My batter soaked for 4 hours. I used a 10 inch oven-safe skillet, and cut the oil down to a scant 3 T. I think I could have done well with even less oil.


Easy Whole Grain Flatbread

Ingredients
1 cup whole wheat flour OR cornmeal, OR chickpea flour (also called besan; sold in Middle Eastern, Indian, and health food stores)
1 t. salt
4 T. olive oil 
1/2 large onion, thinly sliced (optional)
1 T. fresh rosemary leaves (optional)

1. Put the flour into a bowl; add salt; then slowly add 1 1/2 c. water, whisking to eliminate lumps. Cover with a towel, and let sit while the oven heats, or as long as 12 hours. The batter should be about the consistency of thin pancake batter.

2. When ready to bake, heat the oven to 450 F. Put the oil in a 12-inch rimmed pizza pan or skillet (along with the onion and rosemary if you're using them) and put in the heated oven. Wait a couple of minutes for the oil to get hot, but not smoking; the oil is ready when you just start to smell it. Carefully remove the pan (give the onions a stir); then pour in the batter, and return the skillet to the oven. Bake 30 to 40 minutes, or until the flatbread is well browned, firm, and crisp around the edges. (It will release easily from the pan when it's done.) Let it rest for a couple minutes before cutting it into wedges or squares.

Adzuki Butternut Squash Soup

Saturday, January 11, 2014

Day One- Fresh and Delicious on its Own

After Day One- AMAZING with cooked rice or barley!


One day last week we were snowed in and I was ready to cook!

I pulled some squash and tomatoes out of the freezer, and some adzuki beans out of the pantry. I'm probably pronouncing it all wrong, but I love the way that sounds. Adzuki, adzuki...ADZUKI! I had picked a little bag of these cuties up a few months ago because they caught my eye and I thought they were simply adorable. Googling for recipes, I found quite a few intriguing ideas! In Asia, these beans, which are also called Red Dragon beans, are often used as a dessert, like in this awesome-sounding recipe. They are also the base for many bean pastes; if I ever get ambitious enough, I'll try this using this as the filling. These cute little beans could also be the base for a really homey sounding dish, found here.

Google is my friend when it comes to recipes! This soup turned out really tasty, and warmed up my -13 degree, blizzardy day. Adzuki beans may be just another bean (you could certainly use them in good old chili, after all), but darnit, they are so cute, you've just got to buy some, and then try a new recipe! If you are into a bit of spice (just the right amount), you may just like this recipe.

A little summer harvest, pulled from the freezer. Can't think of a better day to use them!

Don't forget how awesome this gadget is when you've got garlic to mince:
originally posted about it here!


For me, the cilantro/oil mixture was a must...perfect topping for this soup.

I left the tomatoes partially frozen to make them super easy to chop.


SOURCE HERE

Adzuki Butternut Squash Soup

You can use vegetable stock if you want, just don't add as much salt. Try serving over brown rice!

2 T. olive oil
1 t. cinnamon
2 t. finely chopped chipotle pepper (from can, or rehydrated from dried chile)
2 t. salt
2 onions
6 cloves garlic, minced
4 c. butternut squash, peeled and cut into 1/4 inch dice (I used diced acorn squash frozen from the fall)
5-6 c. water (can use broth, but cut back on the salt if you do)
5 whole canned tomatoes, chopped
4 cups cooked or canned adzuki beans
cilantro drizzle (optional, but highly recommended)

Heat the oil in a large pot over medium heat. Add the cinnamon, coriander, chipotle and salt and saute for a minute or two--until aromatic. Add the onions and saute another 5 minutes or so, until they start to go translucent. Add the garlic and butternut squash, stir well, and then add 5 cups of water (next time I may cut down to 4 cups). Increase the heat to bring to a boil, and once boiling, reduce heat, cover, and simmer for a few minutes, until the squash begins to soften--5-10 minutes. Once the squash has softened, use a potato masher and break up the squash pieces a bit (I just used the back of my spoon and mashed a bunch of squash cubes against the inside of the pot until I was satisfied). Add the tomatoes, and cook a couple more minutes before adding the beans. Serve drizzled with the cilantro. Serves about 8. To make the cilantro drizzle, finely mince a handful of cilantro, put in a bowl or jar and pour just enough olive oil to coat the cilantro when stirred. Add a couple shakes of salt if you want. This cilantro drizzle is awesome, because it keeps the cilantro tasty and green for days in the fridge.


Adapted from Jae Steele's Get It Ripe: A Fresh Take on Vegan Cooking and Living(Arsenal Pulp Press, 2008)

Last Minute Pizza Sauce

Monday, January 6, 2014


We make a LOT of homemade pizza around here, for lunch and for supper. I used to swear by a very particular brand of pizza sauce, but we are so spontaneous with our pizza making that it is hard to keep the specific sauce on hand. 

I started experimenting with simple sauce recipes, and there are lot of great ones. I invented this one on a whim because I had some frozen tomato paste scoops that really needed used up, and it has become our favorite.  A friend of Simon's who came over for lunch told him that it was the best homemade pizza he ever had! One batch only makes about a cup, which is just about the right amount for a single batch of this pizza dough. 

*If you end up with more dough or more sauce than you needed, both store nicely in the fridge to be used later on for an after school snack or small weekend meal. Handy when you have a teenager at your house. ;)


Last Minute Pizza Sauce

1 T. olive oil
3 T. water
1/2 t. dried oregano
1/2 t. dried basil
1/4 t. garlic powder
1/2 t. sugar
sprinkle of salt and pepper

Thaw out the paste in the microwave. It should only take 30 seconds to one minute. Add all other ingredients and stir very well. The longer you let the sauce sit, the more flavorful it will become, but don't worry...if you need to use it right away, it's still tasty! Add more water if the sauce seems too thick. Spread on your favorite dough and top with your favorite toppings. Enjoy!


Little*Garden*Kitchen Copyright © 2009 Designed by Ipietoon Blogger Template for Bie Blogger Template Vector by DaPino